Hunter Fan Installation Manual: A Comprehensive Guide
This manual details installation for Hunter ceiling fans, weighing up to 23 kg. It covers safety, mounting, wiring, and blade balancing, referencing models from 2002-2020.
Safety Precautions
Prioritize safety during Hunter fan installation. Always disconnect electrical power at the breaker before beginning – this is crucial! Ensure the ceiling support can handle the fan’s weight (up to 23 kg). Use only new, unused anchors when mounting to concrete, verifying the ceiling is sound and crack-free.
Never back out bracket screws during installation; if they turn easily by hand, the support is inadequate. Carefully follow all instructions, and avoid using lubricants when tightening screws into pilot holes. Be mindful of the special coating on downrod threads – do not remove it, as it prevents unscrewing.

Heed recall information: Hunter has recalled 168,000 fans due to installation errors. Refer to the Hunter Fan Support Site for updated guidance and ensure proper installation to avoid hazards. Take care when cleaning; improper methods can compromise safety.
Understanding Your Hunter Fan Model
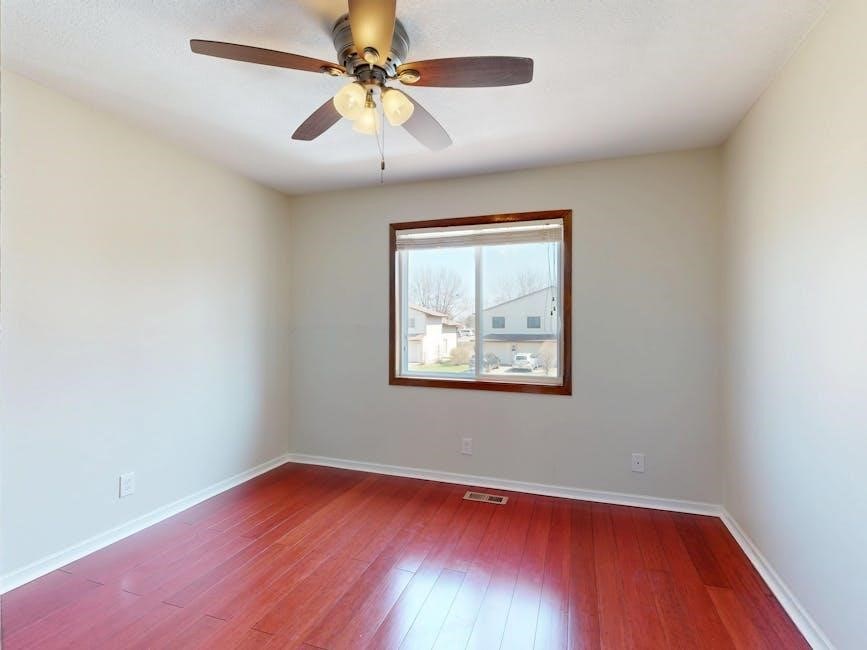
Identifying your Hunter fan model is the first step. Installation instructions vary; locate the model name and number – crucial for warranty assistance and accessing the correct manual. Documents date back to at least 2002 (41564-01) and continue through 2020 (Avia Model: 59416).
Hunter offers diverse mounting options, detailed on their support site. Familiarize yourself with the components included – the manual’s inventory list is essential. Note the weight; models can weigh up to 23 kg, impacting ceiling support requirements.
Pay attention to specific features. Some models include light kits, requiring additional wiring steps. Understand the downrod’s role and the adapter’s thread coating, which prevents loosening. Refer to the manual’s diagrams (like Figure 6) for clarity and ensure a secure installation.
Tools Required for Installation
Proper tools are essential for a safe and efficient Hunter fan installation. While the manual doesn’t provide an exhaustive list, certain tools are consistently needed. A screwdriver is fundamental for securing mounting brackets and blade irons. You’ll likely require wire connectors for safe electrical connections, ensuring color-coded wires are properly joined.
Depending on your ceiling type, additional tools may be necessary. For concrete ceilings, you’ll need appropriate anchors – these must be new and unused to guarantee a secure hold. A drill might be required to create pilot holes, particularly when installing the mounting bracket.
Consider a ladder for safe access to the ceiling. A wire stripper/cutter will aid in preparing the electrical wires. Finally, a level ensures the fan hangs straight, preventing wobble and ensuring balanced operation. No. 1055 or equivalent screws may also be needed.
Preparing for Installation
Before starting, verify ceiling support and disconnect power. Unpack all fan components, carefully inventorying parts against the provided list to ensure everything is present.
Checking Ceiling Support
Ensuring adequate ceiling support is paramount for safe fan operation. The installation instructions emphasize that the ceiling must be sound and free of cracks, particularly when utilizing concrete mounting options. New, unused anchors are absolutely required; do not reuse existing hardware.
Before proceeding, carefully assess the ceiling joists. If mounting directly to a joist isn’t possible, appropriate mounting hardware – often a fan-rated electrical box – must be securely installed. Crucially, the mounting bracket screws should not turn easily by hand. If they do, it indicates insufficient support, and the fan should not be hung until the issue is resolved. Refer to Figure 6 (as mentioned in older manuals) for guidance.
A compromised ceiling can lead to fan instability and potential hazards. Always prioritize a robust and secure mounting solution to prevent accidents and ensure long-term reliability.
Electrical Safety: Turning Off Power
Before commencing any electrical work on your Hunter fan, absolutely disconnect the power supply at the circuit breaker or fuse box. This is a non-negotiable safety precaution to prevent electrical shock and potential injury. Verify the power is off by testing the wires with a voltage tester – do not rely solely on the breaker switch.
Installation manuals consistently stress the importance of electrical safety. Even seemingly minor contact with live wires can be dangerous. If you are uncomfortable working with electrical wiring, it is strongly recommended to hire a qualified electrician.
Double-check that no one can accidentally switch the power back on during the installation process. Clearly label the breaker or fuse to indicate work is in progress. Prioritizing electrical safety is crucial for a successful and hazard-free fan installation.
Unpacking and Inventory of Fan Components
Carefully unpack all components from the Hunter fan packaging, taking care not to damage any parts. Lay out all items on a protected surface, such as a drop cloth or cardboard, to prevent scratches. Refer to the parts list included in your installation manual to verify that all components are present.
This inventory should include the fan motor assembly, blades, blade irons, a mounting bracket, a downrod (if applicable), wire connectors, screws, and potentially a light kit. Note any missing or damaged parts immediately and contact Hunter Fan support for replacements.
Retain the original packaging and documentation for warranty purposes. Familiarize yourself with each component before beginning the installation process. Proper inventory ensures a smooth and efficient setup, avoiding delays caused by missing parts.

Mounting the Fan
Securely mount the fan using the appropriate bracket and downrod. Ensure the bracket screws are tight, and the ceiling support is adequate for the fan’s weight.
Selecting the Appropriate Mounting Option
Choosing the correct mounting method is crucial for safe and stable fan operation. Hunter fans offer various mounting options to accommodate different ceiling structures. Carefully assess your ceiling type – is it a standard flat ceiling, a sloped ceiling, or a concrete ceiling?
For standard ceilings, a standard mounting bracket is typically sufficient. Sloped ceilings require a sloped ceiling adapter to ensure the fan hangs level. Concrete ceilings necessitate the use of appropriate anchors, always new and unused, to securely fasten the mounting bracket.
Never attempt to mount a fan to a ceiling that shows cracks or signs of weakness. If bracket screws turn easily by hand, do not hang the fan; the support is insufficient. Refer to the provided figures in your specific model’s instructions for detailed guidance on selecting and installing the correct mounting hardware. Proper installation prevents potential hazards.
Installing the Mounting Bracket
Securely attaching the mounting bracket is paramount for fan stability. Begin by locating the ceiling joist – this provides the necessary support. If a joist isn’t accessible, utilize appropriate ceiling anchors designed for the weight of the fan (up to 23 kg). Ensure the anchors are new and unused for maximum holding power.
Position the bracket against the ceiling, aligning it with the pre-drilled pilot holes. Insert screws, tightening them firmly but avoiding over-tightening, which could strip the holes. Tighten screws into 9/64 pilot holes; do not use lubricants. The bracket must be flush against the ceiling, with the gasket properly seated.
Crucially, never back out the bracket screws after installation. If they turn easily, the support is inadequate, and you must reassess the mounting location or use stronger anchors. A properly installed bracket forms the foundation for a safe and wobble-free fan.
Securing the Downrod
The downrod connects the fan motor to the mounting bracket, requiring careful attention. Before attachment, inspect the downrod for any damage. Note that the adapter often features a special coating on the threads – do not remove this coating, as it prevents the downrod from unscrewing during operation.
Carefully thread the downrod through the canopy and into the fan motor assembly. Ensure it’s fully seated and aligned before tightening the set screws. These set screws are critical for a secure connection; tighten them firmly using the appropriate tool.
Double-check that the downrod is properly locked in place before proceeding. A loose downrod can cause instability and potential safety hazards. Refer to your specific model’s instructions for torque specifications. Proper downrod installation is vital for a balanced and safe fan operation.
Attaching the Fan Motor Assembly
With the mounting bracket securely installed and the downrod properly connected, you can now attach the fan motor assembly. Carefully lift the motor assembly and align the downrod ball joint with the receptacle in the mounting bracket.
Gently rotate the motor assembly until it fully seats into the bracket. Ensure a snug fit; it should hang securely without any wobble. Some models may have a locking pin or screw that needs to be tightened to fully secure the assembly. Never back out the bracket screws – if they turn easily by hand, the installation is not secure.
Confirm the assembly is firmly attached before proceeding to the wiring stage. A properly secured motor assembly is crucial for safe and quiet fan operation. Refer to your model’s specific instructions for any unique attachment procedures.

Wiring the Fan
Carefully connect the fan wires, observing color coding. Utilize approved wire connectors, ensuring secure connections and proper grounding for safe operation, as per instructions.
Connecting the Wires (Color Coding)
Proper wire connection is crucial for safe and functional fan operation. Typically, the black wire from the fan connects to the black (hot) wire from the ceiling, while the white wire from the fan connects to the white (neutral) wire.
Blue or other colored wires are often for the light kit, connecting to the corresponding colored wire in the ceiling. Always double-check your specific model’s wiring diagram, as color codes can vary.
Ensure all connections are secure using approved wire connectors. Avoid exposing bare wires. If unsure about any wiring aspect, consult a qualified electrician. Incorrect wiring can lead to electrical hazards or fan malfunction.
Remember to turn off the power at the breaker before beginning any wiring work. This is a critical safety precaution to prevent electric shock.
Using Wire Connectors
Securely joining the fan wires to the house wiring requires appropriate wire connectors. Commonly, twist-on wire connectors (wire nuts) are used, ensuring a tight and insulated connection. Select connectors sized correctly for the number and gauge of wires being joined.
Before twisting on the connector, firmly twist the bare ends of the wires together clockwise. This creates a solid mechanical connection. Then, screw the wire connector onto the twisted wires, ensuring no bare wire is exposed.
Gently tug on each wire to confirm a secure hold. If a wire pulls free, re-twist and re-apply the connector.
Avoid over-tightening, which can damage the wires. Properly used connectors prevent shorts and ensure a safe electrical connection. Always inspect connections before restoring power.
Grounding the Fan
Proper grounding is crucial for electrical safety. The fan’s grounding wire (typically green or bare copper) must be connected to the grounding wire in the electrical box. This provides a path for fault current, protecting against electric shock.
Connect the fan’s grounding wire to the grounding screw in the outlet box, or to the bare copper grounding wire if present. Use a wire connector to secure the connection, ensuring a tight and reliable bond.
Never disconnect or bypass the grounding wire. A missing or faulty ground significantly increases the risk of electrical hazards.
Double-check the grounding connection before proceeding with any other wiring steps. Confirm it’s secure and that no bare wire is exposed. A properly grounded fan is a safe fan.
Blade Installation
Securely attach blade irons and then blades, following step-by-step instructions. Proper balancing is essential for smooth, quiet operation, preventing wobbling and ensuring longevity.
Attaching Blade Irons
Begin blade installation by carefully attaching the blade irons to each fan blade. Ensure proper alignment of the screw holes before proceeding. Use the screws provided with your Hunter fan model – do not substitute with different hardware, as this could compromise the structural integrity and safety of the assembly.
Tighten the screws firmly, but avoid over-tightening, which could potentially damage the blade or the iron itself. A snug fit is sufficient to securely hold the iron in place. Repeat this process for all blades, ensuring each iron is attached consistently.
Refer to the installation manual’s diagrams for visual guidance on the correct orientation of the blade irons. Incorrect attachment can affect the fan’s balance and performance. Double-check that all screws are securely fastened before moving on to the next step of securing the blades to the irons.
Securing Blades to Irons
With the blade irons attached, carefully position each blade assembly onto the fan motor housing. Align the holes in the blade iron with the corresponding mounting points on the motor. Use the provided screws to secure each blade, ensuring they are tightened evenly.
Do not use lubricants during this process; the screws should tighten securely into the pilot holes without assistance. The manual specifically cautions against lubricant use, as it can affect the screw’s grip. Tighten screws firmly, but avoid over-tightening to prevent damage to the fan components;
Repeat this process for all blades, maintaining consistent screw tightness across all assemblies. A secure attachment is crucial for safe and balanced fan operation. Regularly check the screws after initial use to ensure they remain tight, preventing potential wobbling or detachment during operation.
Balancing the Blades
After blade installation, observe the fan’s operation for any wobble. A slight wobble is normal, but excessive movement indicates imbalance. Hunter provides balancing kits (often sold separately) to address this. Begin by testing the fan at a medium speed.
If wobbling occurs, use the clip provided in the balancing kit and attach it to the trailing edge of one blade. Repeat the test; if the wobble increases, move the clip to another blade. Continue this process until the wobble is minimized. Once identified, apply the adhesive weight provided in the kit to the top of the blade, directly above where the clip was most effective.
Remove the clip and retest. Fine-tune the weight placement if necessary. Proper balancing ensures quiet operation and extends the fan’s lifespan, preventing stress on the motor and mounting hardware.

Final Steps & Troubleshooting
Complete installation by testing fan operation and light kit functionality. Address common issues like wobbling or wiring problems, and consult recall information if needed.
Installing the Light Kit (If Applicable)
Carefully unpack the light kit components, ensuring all parts are present and undamaged. Refer to your specific model’s instructions, as light kit installation varies. Typically, this involves connecting the light kit wiring harness to the fan’s wiring – often using wire connectors – following the color-coding guidelines (usually blue to blue, white to white, and black to black).
Securely attach the light kit housing to the fan motor assembly, ensuring a snug fit and proper alignment. Install the light bulbs, observing the maximum wattage specified for your model to prevent overheating or damage. Finally, attach the light shade or glass cover, tightening screws gently to avoid cracking. Always double-check all connections before proceeding to the testing phase, and remember to prioritize electrical safety throughout the process.
Testing the Fan Operation
After completing the installation, restore power to the fan at the circuit breaker. Begin by testing the fan’s speed settings – low, medium, and high – to ensure proper operation. Verify that the fan motor runs smoothly and quietly at each speed. Next, test the light kit (if installed), confirming that the lights turn on and off correctly using the wall switch or pull chain.
Observe the fan for any unusual noises, wobbling, or flickering lights. If wobbling occurs, utilize the balancing kit included with your fan, following the instructions provided. Address any issues immediately before prolonged use. If problems persist, consult the troubleshooting section of this manual or contact Hunter Fan support for assistance. A properly installed fan should provide years of reliable performance.
Addressing Common Installation Issues
Wobbling is a frequent concern; ensure all blade irons are securely attached and blades are balanced using the provided kit. If bracket screws turn easily by hand, do not hang the fan – ceiling support is inadequate. Verify the mounting bracket is firmly secured to a joist or approved electrical box.
Wiring problems can occur; double-check all wire connections using appropriate wire connectors, ensuring correct color coding. If the fan doesn’t operate, confirm power is restored at the breaker and all connections are secure. Regarding recalls, be aware of the 168,000 fan recall announced by Hunter due to installation errors. Always use new, unused anchors when installing into concrete. Refer to the manual for specific model troubleshooting.
Hunter Fan Recall Information (Recent Updates)
Hunter fans announced a significant recall on Thursday, impacting approximately 168,000 ceiling fans. This recall stems from a discovered error within the installation process, posing a potential safety hazard. The issue relates to a potential failure of the fan blades to remain securely attached to the motor housing.
Consumers are urged to immediately stop using any recalled fans and contact Hunter Fan Company for a free repair kit. Detailed information regarding affected model numbers and recall procedures can be found on the Hunter Fan Support Site and Help Center. It’s crucial to verify if your fan is part of this recall to ensure the safety of your household. The recall highlights the importance of following installation instructions carefully and utilizing appropriate mounting options.
Warranty Information & Support Resources
Hunter Fan Company provides warranties on its products, varying by model and component. Retain your purchase records and installation documentation for warranty claims. Original Hunter Ceiling Fans are covered under specific terms, often including the motor and other key components.
For assistance, the Hunter Fan Support Site and Help Center offers extensive resources, including installation instructions, troubleshooting guides, and frequently asked questions. You can also find information regarding mounting options and downrod compatibility. Customer support is available through their website or by contacting them directly. Ensure you have your model name and number readily available when seeking support. Proper installation, following the manual, is often a prerequisite for warranty validity.