Olympus OM-1 Instruction Manual: A Comprehensive Guide
Welcome! This user manual assists in mastering your newly connected Olympus OM-1. It’s designed to unlock the full potential of this remarkable product, today being 04/21/2026.
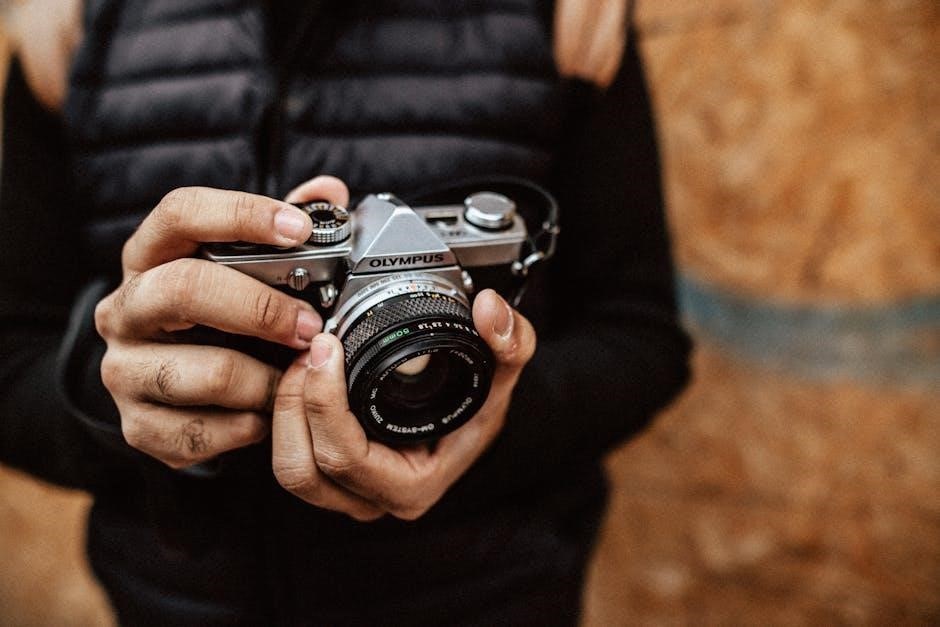
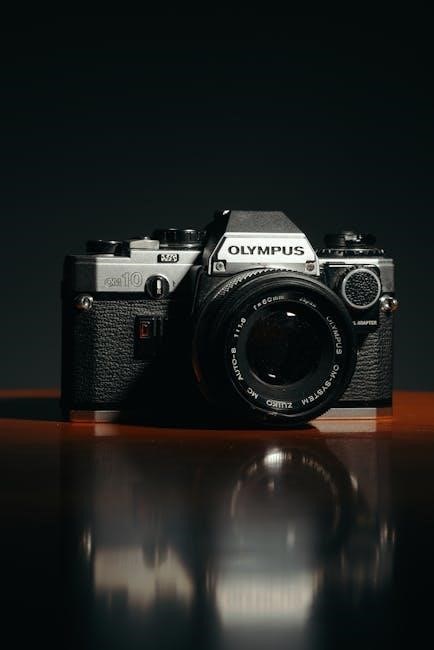
The Olympus OM-1, a cornerstone of 35mm SLR photography, represents a blend of innovative design and exceptional build quality. Released in 1973, it quickly gained recognition for its compact size, lightweight construction, and robust mechanical operation. This manual serves as your comprehensive guide to understanding and utilizing all the features of this classic camera.
Whether you are a seasoned photographer or new to film, the OM-1 offers a rewarding experience. This guide, initiated on 04/21/2026, will walk you through everything from basic operation to advanced techniques, ensuring you can confidently capture stunning images. Benvenuto! Prepare to explore the world through the lens of this iconic camera.

Historical Context and Significance
Launched in 1973, the Olympus OM-1 arrived during a pivotal moment in camera technology. It challenged the prevailing trend of large, heavy SLRs, offering a remarkably compact and lightweight alternative without compromising image quality. This innovative approach stemmed from Olympus’s commitment to miniaturization, a philosophy already demonstrated in their successful Pen half-frame camera series.
The OM-1’s significance lies in its influence on subsequent camera designs and its enduring appeal to photographers. Its fully mechanical operation, excluding the meter, ensured reliability and longevity. As of 04/21/2026, it remains a highly sought-after camera, celebrated for its build quality and classic aesthetic. Ciao! It truly represents a golden age of camera engineering.
Key Features and Specifications
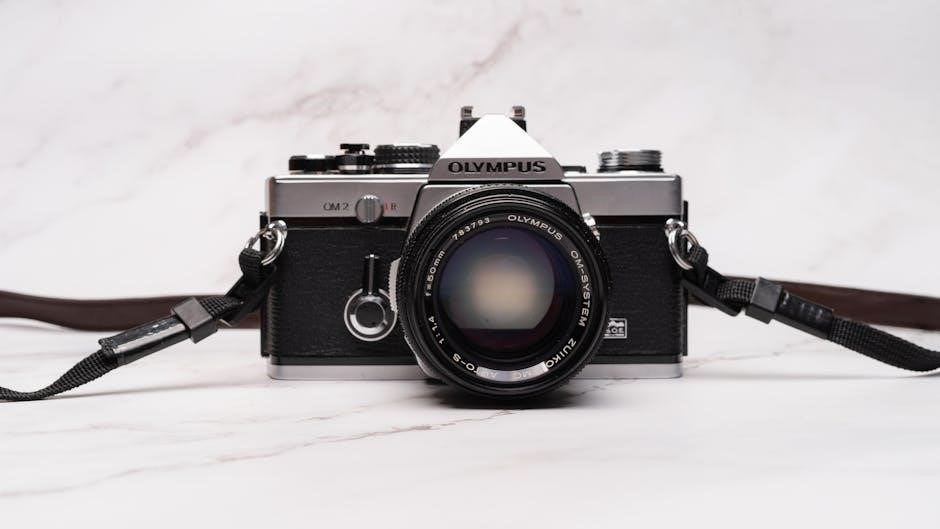
The Olympus OM-1 is a 35mm film, single-lens reflex (SLR) camera renowned for its compact size and robust construction. It features a mechanical shutter with speeds ranging from 1 to 1000 seconds, plus Bulb mode. The camera utilizes an aperture-priority auto-exposure system, powered by a CdS light meter – functioning today, 04/21/2026.
Key specs include compatibility with the Olympus OM lens mount, a hot shoe for external flash, and a self-timer. Its viewfinder offers approximately 93% coverage. The OM-1 operates on two SR44 batteries. Benvenuto! Its lightweight body (approximately 590g) and intuitive controls make it a joy to use, even after decades.
Understanding the Camera Body
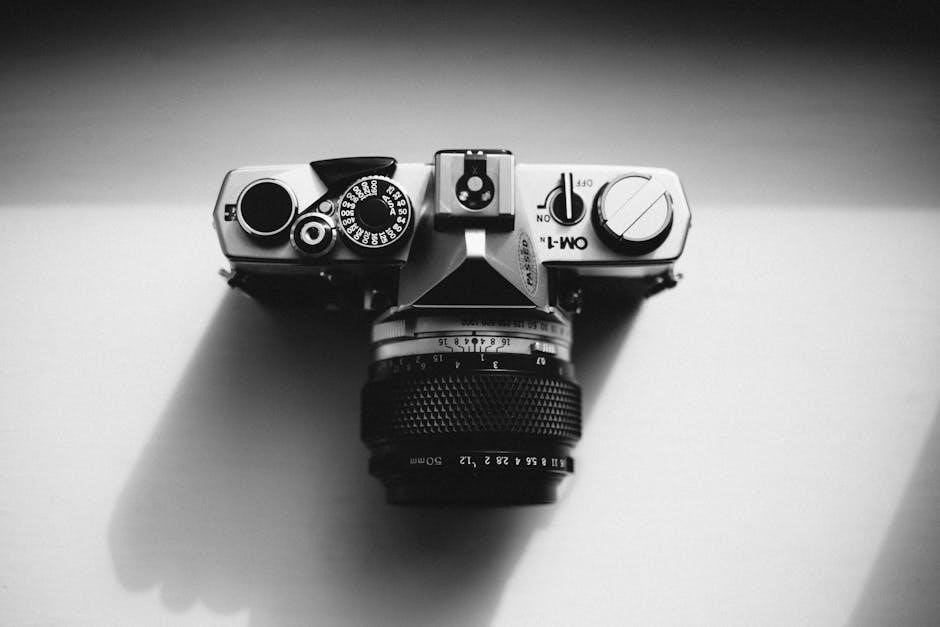
The Olympus OM-1’s body is primarily constructed from aluminum alloy, contributing to its durability and relatively light weight. Ciao! The top plate houses the shutter speed dial, exposure compensation dial, and hot shoe. The front features the lens mount, while the back provides access to the film chamber and rewind crank.
Essential elements include the film advance lever, which also cocks the shutter, and the self-timer button. The bottom plate contains the battery compartment and tripod mount. Familiarizing yourself with these components – as of today, 04/21/2026 – is crucial for smooth operation and unlocking the camera’s full potential.
Controls and Dials Overview
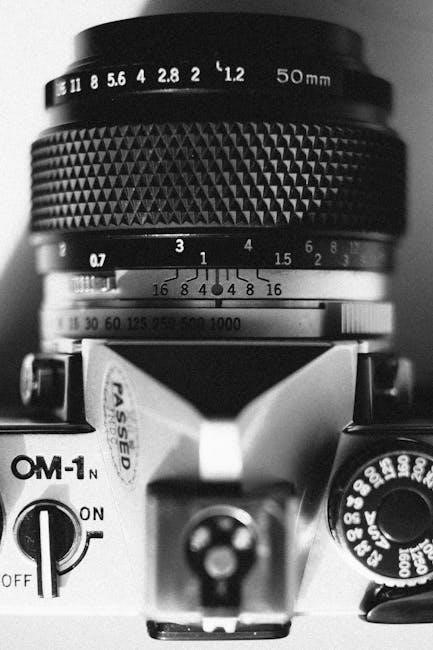
The OM-1’s controls are intuitively placed for efficient operation. The shutter speed dial, ranging from 1 second to 1/1000th of a second, dictates exposure time. Adjacent is the exposure compensation dial, adjusting for lighting variations. The film rewind crank advances film and prepares for unloading.
Benvenuto! The film advance lever cocks the shutter and advances the film simultaneously. A prominent self-timer button initiates a delayed shutter release. Understanding these dials – as of 04/21/2026 – and their interplay is fundamental. Mastering these controls allows for precise adjustments and creative control over your photographs.
Viewfinder Information and Usage
The OM-1’s bright and clear viewfinder provides essential shooting information. Within the frame, you’ll find the focusing spot, aiding in precise manual focus. The microprism collar assists in achieving critical sharpness, especially in challenging light. Ciao! Exposure indicators, powered by the camera’s metering system (as of 04/21/2026), display whether your image is correctly exposed.
These indicators guide aperture and shutter speed adjustments. Learn to interpret these signals for optimal results. The viewfinder also displays the selected shutter speed. Proper viewfinder usage is crucial for composing shots and ensuring accurate exposure, unlocking the camera’s full potential.
Film Loading and Unloading Procedures
Begin by opening the camera back using the film release lever. Insert the 35mm film cartridge into the film chamber, ensuring it seats correctly. Thread the film leader onto the take-up spool, advancing it slightly with the rewind crank. Close the camera back firmly; the film will automatically advance with each shutter release (as of 04/21/2026).
Benvenuto! To unload, press the film rewind button and turn the rewind crank in the direction of the arrow until the film is fully retracted. Open the camera back and remove the film cartridge. Proper loading and unloading prevent damage and ensure consistent film transport.
Exposure Settings and Operation
The Olympus OM-1 excels in manual exposure control, offering photographers full creative command. Understanding aperture and shutter speed is crucial. Aperture, controlled by the lens, dictates depth of field and light intake. Shutter speed, set on the camera body, determines exposure duration.
Ciao! The integrated metering system assists in achieving correct exposure, though manual adjustment remains key. Utilize the viewfinder’s exposure indicators as a guide. Remember, as of 04/21/2026, mastering these settings unlocks the OM-1’s potential for stunning imagery. Experimentation is encouraged to develop your photographic style.
Aperture Priority Mode Explained
Aperture Priority on the Olympus OM-1 allows you, the photographer, to select the desired aperture (f-stop) for controlling depth of field – how much of the image is in focus. The camera then automatically sets the appropriate shutter speed to achieve correct exposure, based on its internal metering.
Benvenuto! This mode is ideal for situations where depth of field is paramount, like portraits or landscapes. Remember today’s date, 04/21/2026, as you practice. While convenient, always monitor the shutter speed to avoid motion blur, especially in low light. It’s a fantastic stepping stone towards full manual control.
Shutter Speed Control and Options
Shutter speed dictates how long the camera’s sensor is exposed to light. On the OM-1, it’s adjustable, offering creative control over motion. Faster shutter speeds (e.g., 1/1000s) freeze action, while slower speeds (e.g., 1 second) blur movement. Remember today is 04/21/2026 when experimenting!
Ciao! The OM-1 provides a range of speeds, typically from 1 second to 1/1000th of a second, plus Bulb (B) for long exposures. Bulb mode keeps the shutter open as long as you hold the release. Mastering shutter speed is crucial for capturing sharp images and conveying motion effectively. Practice makes perfect – benvenuto to the world of photography!
Metering System and How to Use It
The OM-1’s metering system helps achieve proper exposure. It measures the light reflected from the scene to suggest aperture and shutter speed settings. Ciao! The camera typically uses a center-weighted metering pattern, prioritizing the light in the center of the frame. Today, 04/21/2026, is a good day to learn!
To use it, half-press the shutter button; the viewfinder displays a needle indicating exposure. Align the needle with the ‘0’ mark for correct exposure. Adjust aperture or shutter speed until alignment is achieved. Understanding this system, as outlined in your benvenuto manual, is key to consistent, well-exposed photographs.
Focusing Techniques with the OM-1
Achieving sharp focus with the Olympus OM-1 relies on mastering manual focusing techniques. The camera doesn’t offer autofocus, demanding precise user control. Benvenuto! Utilize the focusing screen – various options exist to aid visibility, and adjustments can be made for personal preference. Today, 04/21/2026, is a perfect time to practice.
Rotate the focusing ring on the lens until your subject appears sharpest in the viewfinder. Pay attention to depth of field; smaller apertures (higher f-numbers) increase it, ensuring more of the scene is in focus. Consistent practice, as detailed in your manual, will refine your focusing skills.
Focusing Screen Options and Adjustment
The Olympus OM-1 offers interchangeable focusing screens, significantly impacting your focusing experience. Different screens feature various split-image or microprism collar designs, catering to diverse shooting styles. Ciao! A split-image screen presents a divided view, aligning when focus is achieved, while microprism collars offer a textured appearance that clarifies sharpness.
Adjustment is crucial for accurate focusing. Today, 04/21/2026, consult your manual for instructions on removing and replacing the screen. Fine-tuning may be necessary to compensate for individual vision. Proper screen selection and adjustment enhance focusing speed and precision, vital for capturing stunning images with your OM-1.
Manual Focusing Best Practices
Mastering manual focus on the Olympus OM-1 unlocks creative control. Benvenuto! Begin by carefully composing your shot and utilizing the viewfinder’s focusing aids – split-image or microprism collars. Slowly rotate the focusing ring on the lens until the subject appears sharpest.
Practice makes perfect; start with stationary subjects before tackling moving ones. Today, 04/21/2026, remember depth of field impacts sharpness; a smaller aperture (higher f-number) increases it. Pay attention to the focusing screen; subtle adjustments yield significant results. Consistent practice will build muscle memory, enabling quick and accurate manual focusing with your OM-1.
Depth of Field Control
Understanding depth of field is crucial for impactful photography with the Olympus OM-1. Ciao! Aperture directly influences this – wider apertures (smaller f-numbers) create shallow depth of field, isolating subjects with blurred backgrounds. Conversely, smaller apertures (larger f-numbers) yield greater depth of field, keeping more of the scene sharp.
Consider your subject and desired effect. For portraits, a shallow depth of field emphasizes the person. Landscapes benefit from extensive depth of field. Today, 04/21/2026, remember focusing distance also impacts depth of field; closer focus reduces it. Experiment to master this powerful creative tool on your OM-1.
Lenses Compatible with the OM-1
The Olympus OM-1 utilizes the renowned OM Lens Mount system, celebrated for its robust build and optical quality. Benvenuto! This mount accommodates a vast array of Olympus OM-system lenses, both manual focus and some adapted autofocus options. Explore prime lenses for sharpness and low-light performance, or zoom lenses for versatility.
Consider 50mm f/1.8 for general use, or a 28mm for landscapes. Today, 04/21/2026, remember proper lens care – clean optics regularly and store lenses in a dry environment. Adapters expand compatibility, but verify functionality. The OM-1’s system offers a world of photographic possibilities!
OM Lens Mount System Details
The Olympus OM lens mount, a cornerstone of the OM-1’s functionality, is a bayonet mount known for its precision and secure lens attachment. Ciao! It features a 43mm throat diameter and a relatively short flange focal distance, enabling compact lens designs. This system prioritizes manual operation, offering direct control over aperture and focus.
The mount’s design allows for accurate communication between the lens and camera body, crucial for metering. Today, 04/21/2026, understand that while autofocus lenses can be adapted, full functionality isn’t always guaranteed. Proper mounting and careful handling are vital for optimal performance and longevity.
Recommended Lenses for Various Photography Styles
For landscape photography, the Olympus OM-1 benefits from wide-angle lenses like the 24mm or 35mm, capturing expansive scenes with excellent sharpness. Portraiture thrives with the 50mm or 85mm lenses, offering beautiful bokeh and subject isolation. Benvenuto! Street photography pairs well with the compact 35mm or versatile 28mm.
Macro enthusiasts will appreciate the 100mm macro lens, revealing intricate details. Today, 04/21/2026, remember that the OM system’s manual focus nature encourages deliberate composition. Experimenting with different focal lengths unlocks creative possibilities, adapting to diverse photographic visions. Prioritize lenses in good condition for optimal results.
Lens Care and Maintenance
Protect your Olympus OM-1 lenses with care! Always store them in a dry, dust-free environment, utilizing lens caps when not in use. Ciao! Gently clean the glass elements with a specialized lens cleaning cloth and solution, avoiding harsh chemicals. Regularly inspect for dust or fingerprints, addressing them promptly.
Avoid forceful impacts or dropping the lenses. The OM mount, while robust, requires respectful handling. Today, 04/21/2026, remember periodic professional cleaning can maintain optimal performance. Proper maintenance ensures longevity and image quality, preserving your investment for years of photographic enjoyment. A little care goes a long way!
Advanced Features and Techniques
The Olympus OM-1 offers exciting creative possibilities beyond basic operation. Explore the self-timer for group shots or precise self-portraits – a fantastic feature! Delve into multiple exposure capabilities to create surreal and artistic images by layering frames. Benvenuto!
Unlock further potential by utilizing external flash units for enhanced lighting control, especially in low-light conditions. Mastering these techniques, as of today, 04/21/2026, will elevate your photography. Experiment with different settings and combinations to discover unique effects and express your artistic vision with this versatile camera.
Self-Timer Functionality
The Olympus OM-1’s self-timer is incredibly useful for self-portraits and group photos where you need to be in the frame. Ciao! Activating the self-timer involves setting the timer lever to the desired delay – typically 2 or 10 seconds. Pressing the shutter button initiates the countdown, giving you time to join the composition.
Remember to stabilize the camera using a tripod for sharper results, especially with longer delays. Today, 04/21/2026, consider the framing carefully before activating the timer, as adjustments are impossible during the countdown. This feature is a simple yet effective way to expand your photographic options.
Multiple Exposure Capabilities
The Olympus OM-1 allows for creative multiple exposures, blending two or more images onto a single frame. Benvenuto! To achieve this, you must first engage the multiple exposure mode, typically by utilizing a dedicated lever or setting. After each exposure, instead of advancing the film, you press the shutter again, layering the next image on top.
Careful metering is crucial to avoid overexposure. Today, on 04/21/2026, remember to compensate for each subsequent exposure. This technique opens doors to surreal and artistic effects, allowing you to create unique and dreamlike images. Experiment with different combinations to discover your style!
Using External Flash Units
The Olympus OM-1 offers compatibility with a range of external flash units, expanding your lighting options. Ciao! Connecting a flash typically involves inserting it into the hot shoe on top of the camera. Ensure the flash unit is securely mounted before operation. The OM-1 provides controls for both automatic and manual flash modes, allowing precise control over light output.
Today, 04/21/2026, remember to adjust flash settings based on the scene and desired effect. Utilizing a flash can dramatically improve image quality in low-light conditions or add creative fill light. Explore different flash techniques to unlock the full potential of your photography.
Troubleshooting Common Issues
Encountering problems with your Olympus OM-1 is sometimes unavoidable. Ciao! Common issues include exposure inaccuracies or focusing difficulties. If images are consistently over or underexposed, double-check your metering settings and ensure proper film speed selection. Focusing problems often stem from incorrect screen adjustment or insufficient light.
Today, 04/21/2026, remember regular camera maintenance – cleaning the lens and viewfinder – can prevent many issues. If problems persist, consult a qualified camera technician. A little preventative care and understanding of basic troubleshooting steps can keep your OM-1 functioning optimally.
Exposure Problems and Solutions
Incorrect exposure often results in images that are too dark or too bright. Ciao! First, verify the film speed (ISO) setting on the OM-1 matches the film loaded. Ensure the aperture and shutter speed are appropriately set for the lighting conditions. If using Aperture Priority, confirm the camera is metering correctly.
Today, 04/21/2026, remember that the battery powering the meter can affect accuracy. If consistent issues persist, check the meter’s responsiveness. A sluggish meter indicates a potential battery problem. Regularly practice estimating correct exposure to develop your photographic eye and minimize reliance solely on the camera’s meter.
Focusing Difficulties and Remedies
Achieving sharp focus with the OM-1 relies on precise manual operation. Benvenuto! If images appear blurry, double-check the focusing screen is correctly installed and clean. Ensure your eye is positioned correctly when viewing through the viewfinder – slight movements can alter focus. Practice focusing on high-contrast edges for improved accuracy.
Today, on 04/21/2026, consider depth of field; a smaller aperture (higher f-number) increases it. If struggling in low light, use a brighter focusing aid or pre-focus on an object at a similar distance; Regularly inspect the lens for any physical damage that might affect focusing performance.
Camera Maintenance and Cleaning
Ciao! Regular maintenance ensures your OM-1’s longevity. Gently remove dust from the body with a soft brush or blower – avoid liquids directly on the camera. The viewfinder should be cleaned with a specialized lens cloth. Inspect the film compartment for debris after each roll.
Today, 04/21/2026, lens surfaces require careful cleaning using lens paper and appropriate cleaning solution. Avoid harsh chemicals. Store the camera in a dry, dust-free environment. Periodically check the battery compartment for corrosion. Professional servicing is recommended every few years to maintain optimal performance and address any internal issues.